Saturday, July 30, 2011

Tea Bag Folded Recycled Treasure!


Card Design ©Sharon M. Reinhart 2011
Well, I am at it again - recycling that is!  I used one of my favorite papers to create this tea bag folded medallion - the inside of security envelopes!  They have a variety of patterns and colors.  This tea bag folded medallion also has another twist.  I have used a squash fold and then to give a bit more dimension I gently curled the points on the top layer - just like you would curl a ribbon.  The layers are created using Spellbinder's Labels Twenty One die set and also the Stampin' Up Square Lattice embossing folder.  This folder creates a wonderful textured card stock out of regular card stock - it looks quite substantial.  A glitter brad and a few rhinestones as well as the Inspirational Words Border stamp from Crafty Individuals (Magenta) and my card is complete.  If you would like to learn more about Tea Bag folding check out my most recent book Tea Bag Folding Through the Seasons by clicking on the cover shot at the top right.  Also if you would like to add recycling techniques to your card making please visit the Cardmaker online newsletter From Trash to Treasured Cards July 11, 2011 issue - it's free, sign up today.
That's all for this post - Enjoy!
Creatively yours,
Sharon

Friday, July 22, 2011

Congrats! Iris Fold Card

Card Design ©Sharon M. Reinhart 2011
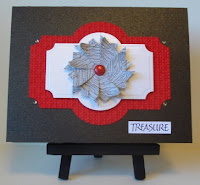
Congratulations is one of those multi purpose greetings that can be used for a variety of special occasions. I created this card for a couple who were recently married in Mexico - hope they like it!  However, this card would also be perfect for a shower, birth of a child, new job, and graduation to name a few. The card was created using an Iris Folding Technique however instead of folding the strips in the traditional way I simply cut them into half inch strips, the solid color strip is a quilling strip. If you are looking for further info on Iris Folding please check out my second book Iris Folding For Christmas by clicking on the photo to the right.  Keep in mind although the designs in this book are Christmas designs it is easy to create cards for other occasions by simply using different papers.
I created the flourish on the corners by die-cutting a fancy tag and then cut it in half and attached it over the corners on the frame. So if you are into using what you have - most people are, use printed papers that coordinate and for the texture on the white frame I cut two pieces of plastic canvas and placed my frame in between then ran it through my Big Shot Machine to emboss.
The materials used in creating this card are a Frame die by Sizzix (I use this one often), Fancy Tags Die Three & Petite Oval Small Die by Spellbinder's, printed papers by Black Market Paper Society (sorry I am not sure that this paper is current I was using leftovers today), brown cardstock, white pearl cardstock, rubber stamp by My Sentiment's Exactly, Chestnut Roan Fluid Chalk ink by Clearsnap and the final touch are a few rhinestones. If you have not tried Iris Folding I encourage you to give it a go.  It truly is not as complicated as it looks. If you are looking for classes or interested in purchasing further design instructions please leave me a comment.
Creatively Yours,
Sharon
Friday, July 15, 2011

Life - Home Decor Project

I find myself drawn to sayings and quotes and often I like to create home decor projects with some of my favorites.  This little home decor project is quick to put together.  The frame is a wood block frame from Michaels which has ben painted and then printed cardstock adhered to the front. There are a couple of ways to adhere the paper.  One is to cut the paper in a square the same size as the frame, adhere it to the frame with a strong adhesive, craft glue or red liner tape. Then cut out the middle section using a craft knife or scissors. The other method is to place the frame right side down onto the wrong side of the paper, trace the outside and inside, cut out and then adhere. I always like to sand all the edges lightly then apply ink to the edges. In this project I have used Tim Holtz Vintage Photo distress ink by Ranger.
The quote is a pre printed quote on vellum (not sure if this exact one is still available) that has been layered onto solid color card stock. Embellish as desired. I have used metal letters, glass mosaic tiles, ribbon, a silk flower and a brad. This is a quick project that would be a perfect gift as well.  Enjoy!
Creatively yours,
Sharon
Blog Hop Button Finished on the 15th: FaveCrafts Blog Hop for July

Monday, July 11, 2011

Recycled and Repurposed Cards!

 Design by Sharon M. Reinhart
Here is a peek at one of the cards you can find in my most recent newsletter for Cardmaker Magazine. If you are looking for inspiration and ideas for ways to recycle and repurpose within your own cardcrafting adventures head on over to CardMaker magazine's July 11th online newsletter. Bet you can't guess what the flowers are made from - its a wonderful resource and a definite way to recycle, check out the newsletter for the answer.
Another new item that I have used in this card is a scallop chipboard frame from a company called Globecraft Memories. I love the quality of the chipboard, it is sturdy and takes inks and paints beautifully. 
Until next time,
Creatively yours,
Sharon

Friday, July 8, 2011

Evermore Thanks Card

Card Design ©Sharon M. Reinhart 2011
Thanks for sticking with me, I know it has been awhile. I hope you enjoy this creation made with Pink Paislee's Butterfly Garden - Nature Sancturary Paper. It is a beautiful print and perfect for the addition of handmade flowers. The flowers have been created with the Pink Paislee printed cardstock along with fancy ivory paper from The Paper Company. I love making my own handcrafted flowers - can you tell, they keep appearing on my creations. Simply die cut scallop shapes, I used the Spellbinder's Big Scalloped Circles SM die #2 (#1 being the smallest). Lightly mist the scallop circles and then gently crumple and unfold.  From there stack the layers together (anywhere from 5 - 7 layers if creating with papers and cardstocks and not tissue). Pierce the center, insert brad and fold back prongs. One layer at a time crumple up and inwards to create a tight bud. Lightly mist with water or you might like to try the new Fireworks! craft ink sprays from Tsukineko. I completed a designer challenge project for the Be Inspired event (which is now sold out) for the CHA summer show in Chicago in which these sprays were used - loved them. They have beautiful color as well as shimmer. Once the tight bud has dried, gently manipulate the petals open until you have achieved your desired effect then sponge edge of petals with ink. The greeting on this card is a Penny Black stamp.

If you are looking for inspiration on how to recycle and repurpose within your card crafting check out the CardMaker Magazine online newsletter going live on July 11th. It is a free newsletter, so sign up and it will be delivered to your inbox. Hope you gather some new ideas from it. Also look for the Card Making Around The House feature in the magazine available at newstands or by download.
Creatively Yours,
Sharon